
Last Updated: November 21, 2026
Quick Summary
Electric underfloor heating installation time depends on room size and how much preparation the subfloor needs. A single room with a sound subfloor typically takes two to three working days on site, but curing adds several days or weeks before switch-on. Separate working days from elapsed calendar days when planning.
- Single-room retrofits up to around 10 m² on a sound subfloor take roughly two to three working days on site.
- Multi-room or open-plan projects typically need four to six working days on site, plus curing.
- Curing before switch-on takes several days to a few weeks, set by the adhesive or screed supplier.
- Give on-site days and elapsed calendar days as two separate figures to avoid scheduling errors.
- Set the thermostat’s maximum floor temperature before the first heat cycle, especially for timber and vinyl.
Table of Contents
- How Long Does Underfloor Heating Take to Install?
- Electric Underfloor Heating Installation Process, Step by Step
- Electric Underfloor Heating Floor Preparation Before Installation
- Installation Time by Project Type and Stage
- Electrician Checkpoints and Testing During Installation
- When Can You Switch On Underfloor Heating After Installation?
- Booking Your Electric Heating Installation With Flexel
- Frequently Asked Questions
How Long Does Underfloor Heating Take to Install?
The time an electric underfloor heating job takes depends on the size of the room and how much preparation the floor needs. Flexel can advise on timing for your specific project. Installation time is not the same as the wait before the floor is warm, and the two are easy to confuse.
Most of the time goes on preparation and curing rather than on the heating elements themselves. A small room with a clean, level subfloor moves quickly. A larger room, or one that needs levelling, takes longer.
Many homeowners find it helpful to plan around three separate stages:
- Preparation: clearing the floor, levelling and checking the subfloor
- Installation: laying the elements, fitting the sensor and connecting the controls
- Curing and testing: letting adhesive or screed set before the floor covering goes down and the system is switched on
Electric Underfloor Heating Installation Process, Step by Step
A typical installation follows the same basic order, whatever the room. Each stage depends on the one before it, so skipping a step usually causes problems later.
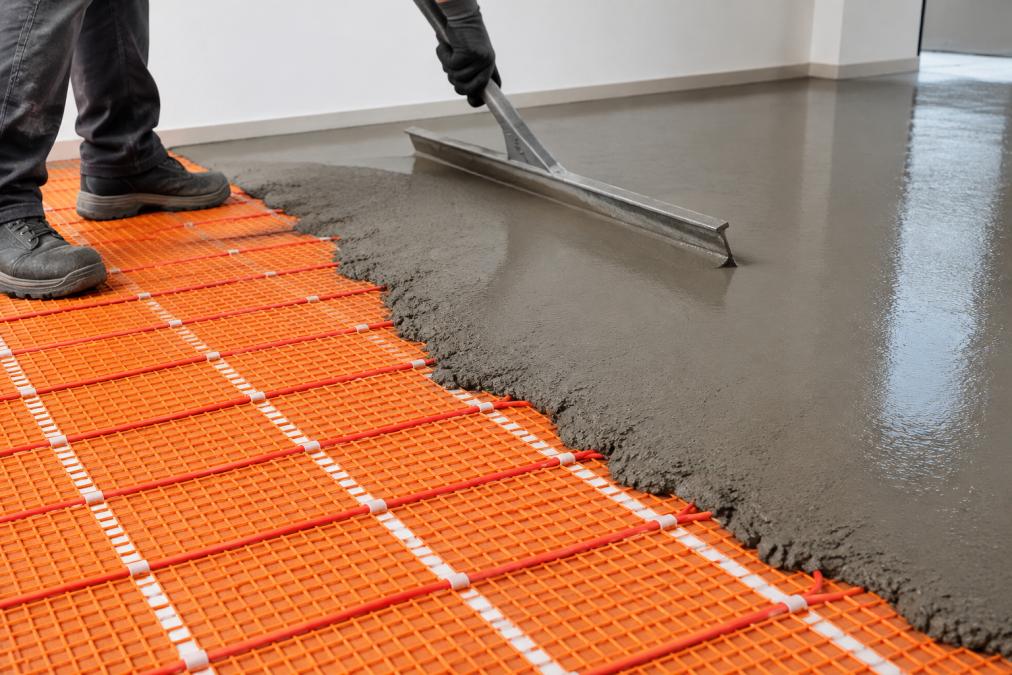
Electrician screeding over a Flexel EcoFloor cable mat laided on top of EcoMax Thermo boards to seal in the elements
Start by surveying the room. Measure the floor area, note fixed fittings such as kitchen units and bathroom suites, and mark where the thermostat will sit. Then check the power supply, because a qualified electrician will need to confirm the circuit can carry the load.
Planning the Layout and Ordering Components
Planning the layout is the stage that saves the most time later. Sketch the room to scale and mark the areas that will not take heat, such as under fixed units. This avoids fitting heating where it cannot be used.
Order the components once the layout is confirmed. A typical kit includes the heating elements, a floor sensor, a thermostat and the connection leads. Flexel offers a free survey and quotation to help match the system to the room.
Fitting the Heating Elements and Sensor
Lay the elements flat and keep them evenly spaced, without crossing or overlapping them. Fit the floor sensor in a position the manufacturer’s instructions specify, so the thermostat reads the floor accurately.
Check the resistance of the elements before and after fixing them. A reading taken at each stage shows whether any damage happened during fitting, and it gives the electrician a record to refer to during testing.
Electric Underfloor Heating Floor Preparation Before Installation
Good preparation decides how well the system performs. The subfloor must be clean, dry, level and firm before any element goes down. Loose debris, dust or high spots can damage the elements or leave an uneven finish.
Choosing the right product also depends on the subfloor. Our floor construction details for underfloor heating explain which product suits your subfloor and chosen floor covering. The type of floor covering matters too, since tile, laminate, vinyl and timber each suit different systems. Check the product guidance for your floor before ordering.
Common preparation mistakes include:
- Laying elements on a damp or uncured screed
- Skipping levelling, which leaves high spots that crack finishes
- Fixing elements over expansion joints
- Forgetting to mark fixed fittings before the layout is set
Installation Time by Project Type and Stage
The time a job takes depends on the project, but the useful way to plan it is to separate working days on site from elapsed calendar days, because curing and drying add waits during which no one is installing anything.
A general stage-by-stage breakdown for an electric underfloor heating system can look like this:
- Survey and layout planning: half a day. Measuring the room, marking fixed fittings, confirming the circuit and sketching the element layout.
- Subfloor preparation: half a day to two days. Cleaning, priming and levelling; longer where an existing floor covering has to come up or a self-levelling compound needs to set.
- Laying elements and sensor: half a day for a single room, one to two days across several rooms. Mats and film go down quickly on a flat subfloor; loose cable takes longer because spacing has to be set by hand.
- Electrical connection and first tests: half a day with a qualified electrician, including resistance and insulation checks before the elements are covered.
- Embedding and floor covering: one to two days, depending on whether the elements are bedded in adhesive or tile adhesive and what covering goes on top.
- Curing before switch-on: typically several days to a few weeks, set by the adhesive, levelling compound or screed manufacturer rather than by the installer.
- Commissioning and handover: half a day. Functional checks, thermostat set-up and recorded test results.
Put against project types, with the assumptions stated:
- Single-room retrofit, up to around 10 m², sound existing subfloor: roughly two to three working days on site, plus curing. Access to the consumer unit and a clear room are assumed.
- Single room needing levelling or an old covering removed: add one to two working days, and add the setting time of any levelling compound.
- Multi-room or open-plan project: four to six working days on site, plus curing. Coordination with other trades and the number of separate heating zones drive the range.
- New build with screed: the physical installation may be quick, but the screed drying programme usually sets the calendar.
Watch out: quoting a single figure for the whole job hides the curing wait, and homeowners then book floor coverings or move furniture back before the floor is ready. Give the on-site days and the elapsed days as two separate numbers.
Flexel’s ink-based EcoCloth elements and EcoFilm element are manufactured at its factory in Glenrothes. Check product information on flexel.co.uk for accuracy before building a schedule.
The table below sets out each stage of the job with the time it typically takes, so the on-site days and the wait for curing can be planned separately.
Stage | What happens | Typical time |
|---|---|---|
Survey and layout planning | Measure room, mark fixed fittings, confirm circuit | Half a day |
Subfloor preparation | Clean, prime and level the subfloor | Half a day to two days |
Laying elements and sensor | Lay mats or film, or set cable by hand | Half a day (one room) to two days (several rooms) |
Electrical connection and first tests | Resistance and insulation checks before covering | Half a day |
Embedding and floor covering | Bed elements in adhesive or tile adhesive, fit covering | One to two days |
Curing before switch-on | Wait for adhesive, levelling compound or screed to set | Several days to a few weeks |
Commissioning and handover | Functional checks, thermostat set-up, test records | Half a day |
Electrician Checkpoints and Testing During Installation
An electrician should test the system at several points. These checks confirm the elements work before they are covered, and they catch faults while they are still easy to fix.
The main checkpoints are:
- Before covering: resistance and insulation tests on each element
- After connection: confirm the thermostat and sensor respond correctly
- After curing: a final functional check before the floor covering goes down
- Handover: record the test results and give the homeowner a copy
Keep a written record of every test. It is useful if a fault appears later and the installer needs to trace the cause.
When Can You Switch On Underfloor Heating After Installation?
Do not energise the system as soon as the elements are fitted. There are two separate waits, and confusing them is the most common scheduling error:
- Curing: the adhesive, tile adhesive, levelling compound or screed must reach the strength the manufacturer specifies before any heat is applied. Heating too early drives moisture out too fast and can crack the finish or break the bond to the elements.
- Warm-up: once the floor is cured and the covering is down, the floor temperature is raised in steps rather than set to full heat. A common pattern is to start well below the target and increase in stages over several days, following the flooring and system guidance.
The safe sequence most installers follow is:
- Resistance and insulation tests on each element before it is covered.
- Embedding in adhesive or screed, then curing to the manufacturer’s stated period.
- Floor covering fitted and its own setting or adhesive time allowed.
- A functional check of thermostat and floor sensor.
- A stepped warm-up, with the floor temperature checked against the covering’s maximum.
- Handover with recorded test results.
Watch out: some floor coverings, timber and vinyl in particular, have a maximum floor temperature, and running the system at full output during the first warm-up can exceed it. Set the thermostat limit before the first heat cycle, not after.
Curing times are set by the adhesive, levelling compound or screed supplier, not by the heating manufacturer, so confirm the figure with your installer and keep the product data sheet. Flexel’s EcoCloth and EcoFilm systems are made at its factory in Glenrothes. Read the installation guidance on flexel.co.uk alongside the flooring supplier’s instructions before the system is energised.
Booking Your Electric Heating Installation With Flexel
Planning the job early makes every stage easier to schedule. Flexel can help you choose a system suited to your rooms, and you can request a free survey and quotation to start.
For the parts you need, you can explore Flexel’s electric underfloor heating systems, If you plan to fit the system yourself or with a team, the ECOFILM PRO professional underfloor heating kit includes the installer’s tools.
Many buyers want to understand the full process before they commit. Our step-by-step guide to installing electric underfloor heating covers each stage in more detail, and our underfloor heating FAQs answer common questions on running costs, thermostats and floor coverings.
To discuss your next project Contact Us to get the conversation started.
Flexel: Heating people first since 1978
Frequently Asked Questions
How long does electric radiant heating take to install?
Installation time for a single room depends on several factors, and the whole project can run longer than the fitting itself. Time depends on the room size, the number of heating mats or cable runs, how much of the floor needs preparing, and whether an electrician must test the circuit before the floor covering goes down. Installation time is separate from curing time and from how long the floor takes to warm up. Your installer or a Flexel quotation can give a timing that fits your specific room.
Can electric underfloor heating be installed beneath existing flooring?
This depends on the existing floor, its height and whether the subfloor is suitable. Lifting existing finishes is often needed so the heating element can be bonded to a sound, level base, because the element must sit firmly and any gaps or movement can cause problems. Retrofit installations in an existing room are common, but the floor height may limit which products can be used. Speak to Flexel before you start so the system can be matched to your floor build-up.
How long after installation can electric underfloor heating be switched on?
Do not switch the system on until the adhesive or screed has cured fully and the electrician has completed their checks, including resistance and insulation testing. Switching on too early can damage the bond or the element. Curing times depend on the material used and the conditions in the room, so follow the adhesive or screed manufacturer’s guidance. Once curing is complete and testing is signed off, the system can be commissioned and set to the required temperature.
What affects the time needed to install electric underfloor heating?
The main factors are the room size, the complexity of the layout, how much furniture or fixed fittings must be avoided, the state of the subfloor and the number of circuits. Preparation work, such as levelling or clearing the floor, can take as long as the heating fit itself. Electrician involvement for connection and testing also adds time. A simple, open room with a prepared floor will take far less time than a room with many obstacles or a subfloor that needs repair.